 Engineer Sushil Kumar Sushil Kumar Profile
June 2020 brings us many changes since Magento 1 support is coming to an end. Whether you’re considering building a new store on Magento 2, or you have already started the transition, there are (more than) a few things to keep in mind to ensure your traffic and (more importantly) revenue doesn’t get lost during the migration.
Migration to Magento 2 is stressful for every store owner, but the change is inevitable. We have already prepared a list of the most common SEO mistakes during the migration, but we wanted to do more, so we decided to create this SEO checklist to make your transition as smooth as possible.
1. Define your migration scope
The first (and most important) thing to do when moving your store to a different platform is to define the migration scope. It can be complex and time-consuming, but it’s necessary if we want to avoid any last-minute difficulties that could postpone the launch.
Analyze your data to see if there’s anything that could be improved and define a category tree. Write down all the extensions and third-party integrations you’re currently using and consult with your developers regarding their replacements. Many extension providers now offer their extensions for both Magento 1 and Magento 2, but we would advise you to test them out first because some features might be different then they were on Magento 1 (it is a different platform after all).
Go through each customization ever made on your store and make notes on those you want to keep on your new store as well. From our experience, bigger and more complex stores usually have more customizations, so make sure to cover everything to get the realistic estimate on the time-frame of migration, as well as to be ready for further online store optimization.
2. Understand the current state of your site
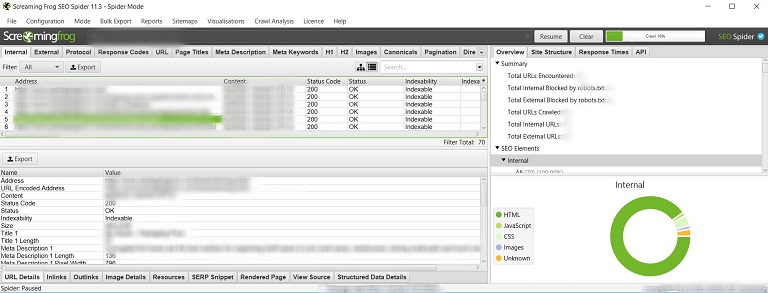
Analyze your performance both manually through Google Analytics and Google Search Console, but also through a crawling tool (for example – ScreamingFrog).
Make a spreadsheet with all the URLs and their data ( for example – meta robots, canonical tags, revenue, conversion rates, etc). This is often a huge and, at first glance, unreadable file but with the right filters, it’s possible to analyze each page separately and make informed decisions when the time comes.
Gather as much information possible because you will need those later.
3. Catalog data should be a priority
The third (and the most important thing) you need to ensure is the quality of your catalog data. If you don’t have all the necessary data (including products, categories, and attributes), your store could experience a huge loss, especially in terms of SEM.
If you’ve already noticed some flaws in your data, now is the right time to fix them. Review the category & CMS pages descriptions, URLs, Meta Titles, H1s, and Meta Descriptions. If you’ve made any changes to category tree, do keyword research and prepare content for new pages. You want to cover everything to keep your rankings on your most important keywords as high as they were prior to the launch (or even higher).
Make sure all the products, along with their images, attributes, descriptions, and Meta Data are properly migrated. Double-check, or even better, triple-check everything because data can get messed up during the migration.
If your catalog is big, it’s expected that you won’t go through each and every product to see if there’s anything important missing, but we have a little trick for those cases as well. Configure the Google Shopping feed and exclude products without, for example, shipping weight. If the number of products is the same in Google Shopping Feed as the number of in-stock products in your catalog, you can rest assured knowing that all your products have a shipping weight assigned.
Quality Category and Product data will not only affect your Organic results, but it can also have a big effect on your PPC performance, so invest as much time needed into data optimization. It’s an investment that pays off in the long run.
4. Define your indexing strategy
One of the most complex tasks you need to perform is to define your indexing strategy. eCommerce stores come with different sets of features than other websites, which can easily cause issues with duplicate content.
If you have a large site with a lot of different filter options, you should be especially careful with the faceted (layered navigation) because you’ll probably want to exclude the vast majority from indexing. In some cases, it’s better to completely block the crawlers with “noindex, nofollow” directive, but if your site isn’t too big, you’ll want to leave the “noindex, follow” tag, that will allow the search engines to crawl the pages and links, but it will also send a directive which prevents indexing those pages.
Another type of pages you certainly want to exclude from indexing are search result pages. There can be quite a lot search result pages and you don’t want to waste your crawl budget on those.
After you decide on your indexing strategy, it’s important to prepare a robots.txt file. Keep in mind the robots txt and meta robots conflict and you’ll be good to go.

5. Review your Tags
Once you’ve decided on your indexing strategy, it’s crucial to verify that all the Tags are properly implemented.
Magento comes with many interesting features, but to utilize them completely, you need to know how to control them. Sort options are great for your customers and their user experience, but if you don’t implement the appropriate canonical tags, they can cause you serious damage when it comes to SEO (since they create a new version of URL with added parameters).
From our experience, the best practice is to remove any parameters (except pagination) from your canonical tag and point it out to a parent category. When it comes to pagination, although there was a lot of noise that Google isn’t using the rel=prev/next tags as indexing signals, we wouldn’t abandon these just yet. We should still use those for informing the search engines about the relationship between different sequence URLs, as well as to provide additional information to other search engines. Even Google advised us to keep doing everything the same as you did before the announcement, so there’s no reason to abandon the rel=prev/next tags on your Magento 2 site.
Products should always have canonical tags that point to themselves, as well as all other CMS pages (that aren’t a duplicate, of course). Images should also have the ALT tags to help the search engines understand the content better.
If you own a multi-store website with different location targeting, implement the hreflang tags throughout the store. You will not only let Google know that there’s another version of your main store, but you’ll also ensure that the right version of your store shows to the right customers.
Remember, everything you do on site should be in-line with your SEM strategy.
6. XML Sitemap
Review your sitemap. You will probably want to remove some pages from the sitemap, as well as add some custom pages that aren’t included by default. Discuss the customization with your developers and be prepared for the launch.

7. Structured Data Markup implementation
We can’t stress enough how important it is to implement a microdata markup on an eCommerce site. Properly implemented structured data markup not only helps Google to understand your content better but rich snippets (such as price, review, breadcrumbs, etc.) can also increase your CTR.
Magento 2 comes with product structured data out of the box, but to get all the microdata in place, you will also need additional customization. Don’t try to be scammy with reviews because Google will notice it and punish your site.
8. Don’t lose any juice – start preparing the 301 redirects
One of the most often reasons why migration to a new platform lead to a significant decline is a poor implementation of 301 redirects.
To avoid such losses and to keep all those backlinks you gained during the years of optimization and SEM, you need to take care of the broken URLs.
Remember that spreadsheet we mentioned in the second step? Now is the time to open it, as well as to make a new crawl report on your staging site. Compare the reports to see if there’s anything that changes (or doesn’t exist) on your new site and map the proper rewrites. Don’t forget about the old redirects that you have on your current site, because they also need to be redirected to the new URLs.
You can import these through Magento Admin or through a .htaccess file, but keep in mind that having too many redirects in .htaccess can have a serious impact on TTFB (Time to first byte).
If there are many URLs that need a rewrite, the best solution is to prepare a spreadsheet with Old and Targeted URLs and discuss with your developer implementation of an option that will allow you to bulk upload all the rewrites.
9. Test, test, test!
Before you launch your new website, test every single thing from this list one more time. QA is extremely important because you might have missed something, or something has stopped working as expected due to the third-party integration.
Also, test out the site speed since the slow website can vigorously affect your performance. Consult with your developers, and make necessary changes.
Don’t rush into the launch. Take some time, check everything you’ve done so far and you’ll have far less stress on the launch day.

10. After-launch tasks
After you launch your new Magento 2 store, there are still a few more things to do on the SEO side. First of all, upload the new robots.txt file to allow the crawlers to go through your website and to index the data.
Second, upload your new sitemap to Google Search Console and verify your property so you can track the performance after the launch.
Third, make sure that your tracking is working correctly. If the tracking isn’t working, you won’t be able to get any insights on the actual performance.
Even if you’re certain that you did everything right, don’t forget to monitor the data. Keep an eye on the number of pages indexed, keywords, average positions, traffic, and 404 reports in both Google Search Console and Google Analytics. Do an additional crawl of the entire site and compare it with your first crawl. Only by doing all of these, you’ll be able to react on time and catch all of the additional URLs that may be causing issues on your site.
Seek out for help
I hope this article will help you prepare your site for the migration, as well as to quickly assess what went wrong if you notice a decline in performance. If you have anything else you’d like to add to this list, feel free to comment below.
If you need any help with your migration to Magento 2, whether you’re just starting with it or you’ve already moved and noticed a significant decline after the launch, get in touch. We can assess your site and help you detect and overcome the issues with our technical SEO advice by our expert team.
The post SEO Checklist for Magento 2 Migration appeared first on Inchoo.